
Cloud Rendering Adobe After Effects Video with Windows Docker Container
Since I run Newbie Homemade Mashup Lab, I always have video render needs for After Effects. When there are many videos, my personal computer will spend a lot of time rendering them. During this time, I cannot do anything else. So, I came up with the idea of Cloud Rendering. This article will guide you to build your own After Effects Docker image and ultimately try rendering on Azure App Service.
TOC
- Prerequisite
- Download After Effects install Package
- Launch a Windows Server container and install After Effects
- (Optional) Install After Effects Plugins: Take Plexus as Example
- Rendering Locally
- Rendering on Azure App Service
- Conclusion
Prerequisite
Before we start, we need to confirm whether our operating environment is suitable and whether we have all the relevant tools. Please refer to the following table for verification.
| Host Machine / OS | Hardware configuration requires at least a 4-core processor and 8GB of memory. The operating system must be Windows 10/11 and a 64-bit operating system. |
| Software | Installed Docker Desktop Windows |
| Software (Optional) | Installed Adobe After Effects 2022 Must have a genuine license |
| Software | Adobe After Effects Installer Package Must have a genuine license |
| Software (Optional) | Rowbyte Plexus Plugin Must have a genuine license |
| Cloud Platform | Azure account with a subscription |
Please be notice that the Adobe After Effects Installer Package is not the installation file used on personal computers in the past. We need to use silent install this time and download a dedicated installation program from the Adobe official website.
Download After Effects install Package
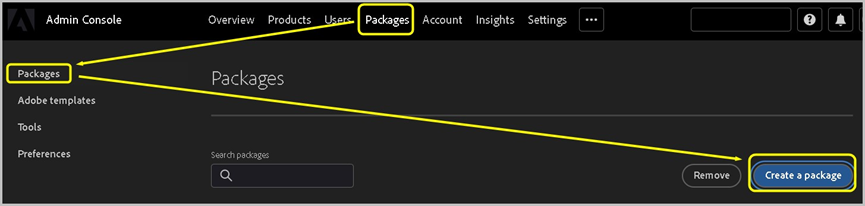
Visit https://adminconsole.adobe.com/
Create a package.
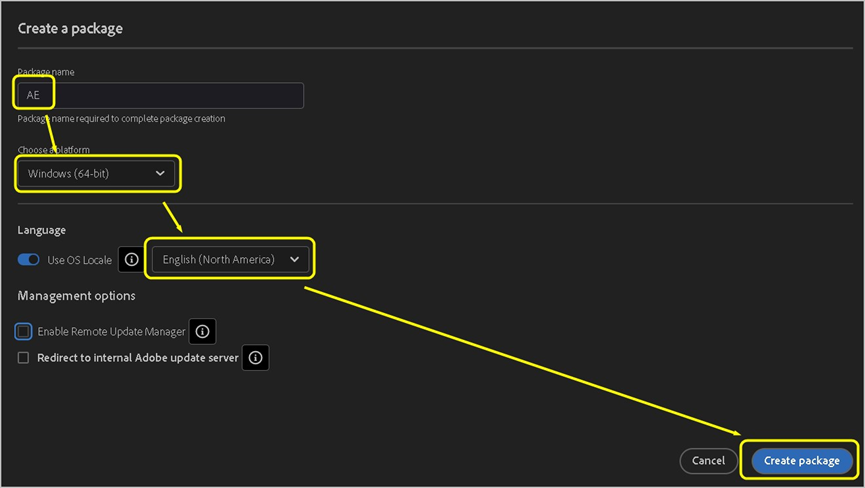
Specify your preferred name (and we will use it later), for example AE, selecting Windows (64-bit), selecting English (North America), then click Create package.
Download the installation package.
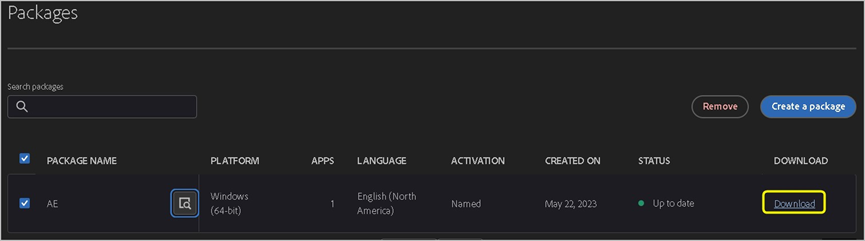
For example, we give it a name AE_en_US_WIN_64.zip for further use.
Launch a Windows Server container and install After Effects
On our host machine, put AE_en_US_WIN_64.zip on your desktop, then open a terminal and run the following command to create a Windows container.
docker run -it --cpus=4 --memory=8192m -v C:/Users/CCH:C:/Users/ContainerUser mcr.microsoft.com/windows/server:ltsc2022 cmd.exePlease change C:/Users/CCH into your home folder name.
It might take a while for downloading, please run the following command once it finished. This command used to install the chocolatey package manager.
@"%SystemRoot%\System32\WindowsPowerShell\v1.0\powershell.exe" -NoProfile -InputFormat None -ExecutionPolicy Bypass -Command "[System.Net.ServicePointManager]::SecurityProtocol = 3072; iex ((New-Object System.Net.WebClient).DownloadString('https://community.chocolatey.org/install.ps1'))" && SET "PATH=%PATH%;%ALLUSERSPROFILE%\chocolatey\bin"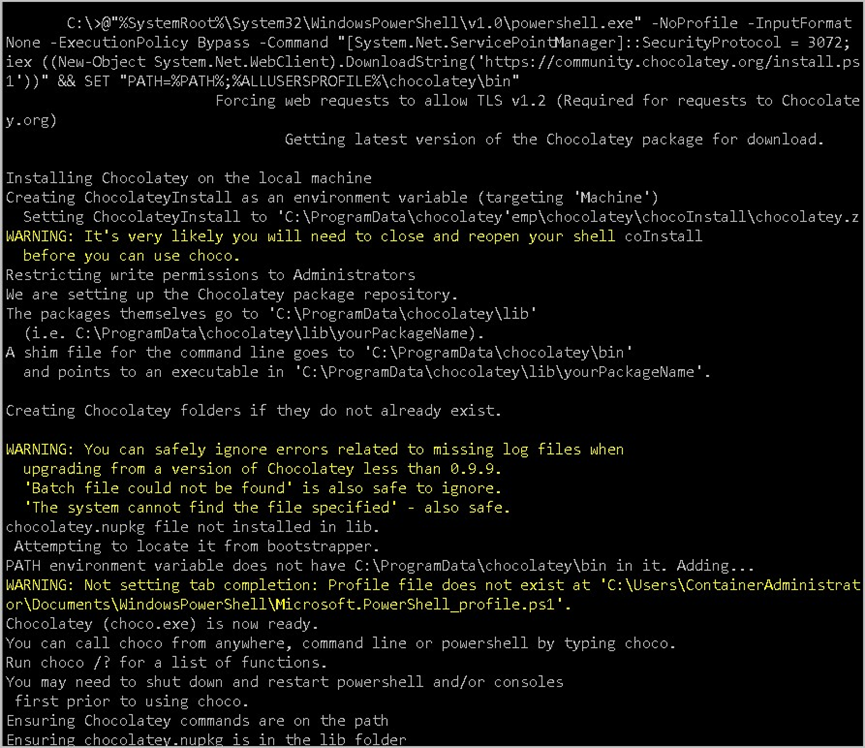
And then, run the following command to install some tools related to the installation process.
choco install -y nano unzip ntop.portable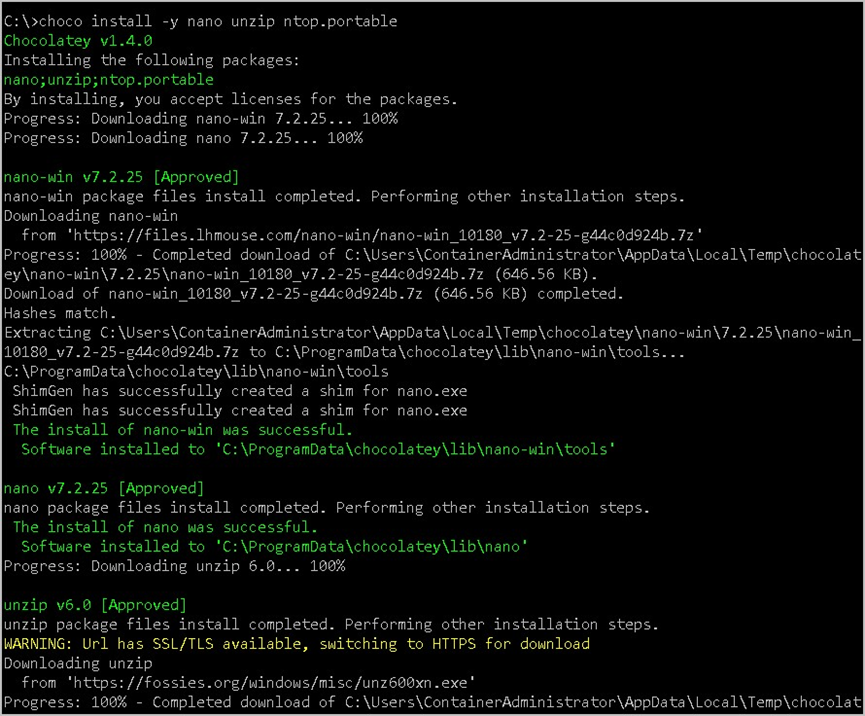
Create a link from by running this command.
mklink /h /j "C:\Users\CCH" "C:\Users\ContainerAdministrator"Please change C:\Users\CCH into your home folder name.

We are copying and extracting the installation package from our host machine to the container by running this command.
copy "C:\Users\ContainerUser\Desktop\AE_en_US_WIN_64.zip" "C:\Users\CCH\Desktop"
cd "C:\Users\CCH\Desktop"
unzip AE_en_US_WIN_64.zip
Please change C:\Users\CCH into your home folder name.

It might take a while for extracting, please run the following command once it finished. This command used to install Adobe After Effects on your container.
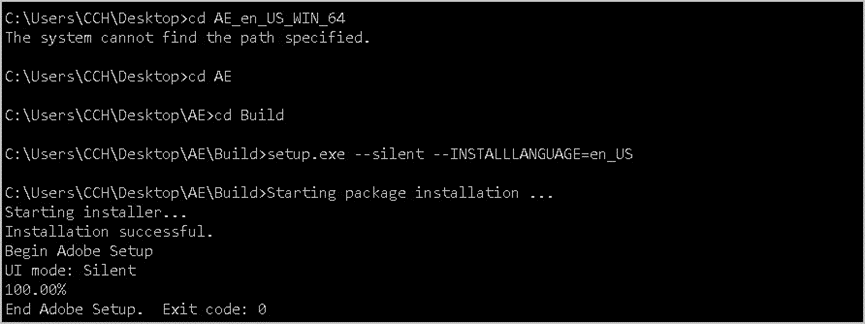
cd AE
cd Build
setup.exe --silent --INSTALLLANGUAGE=en_US
Depends on the name you have specified on the previous step, please change AE to your specified name.
We are done.
(Optional) Install After Effects Plugins: Take Plexus as Example
Almost every After Effects projects need the plugins, I take Rowbyte Plexus for example.
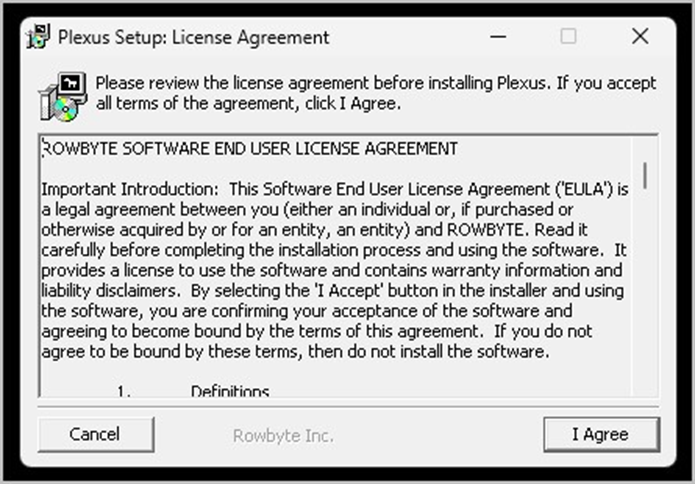
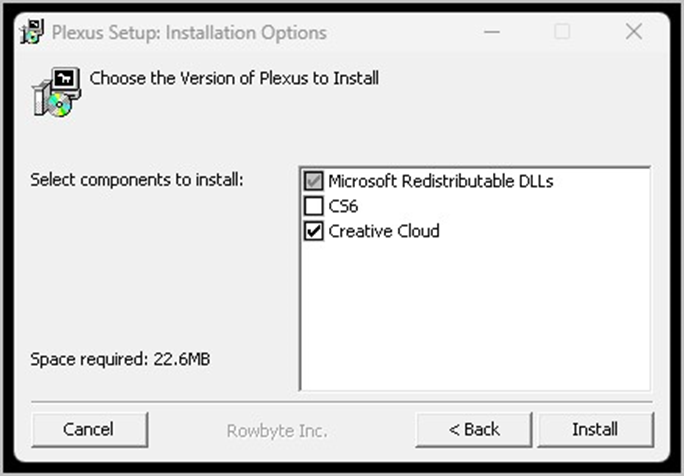
Before we apply this plugin to the container, we must normally install it on the host machine and activate it to obtain the installed files and activation key file.
Then we can put the installed files and activation key file from host machine to the container. We firstly install the plugin, and the process is nothing special.

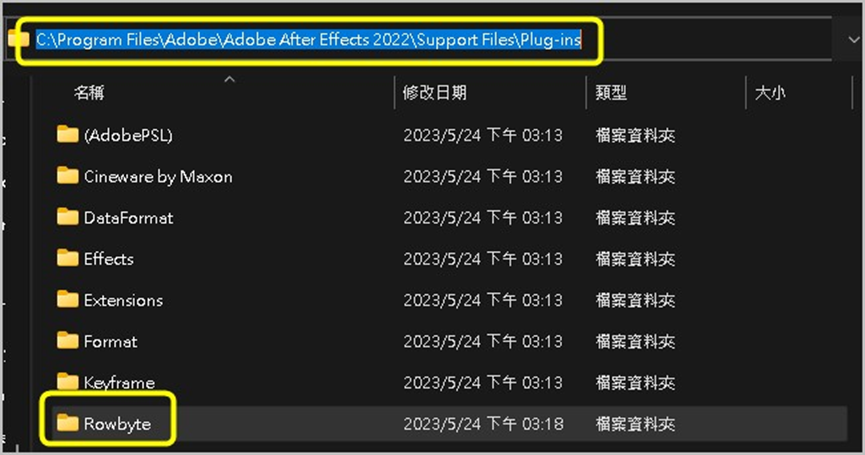
Here it is. After the installation, we locate the file path in:
C:\Program Files\Adobe\Adobe After Effects 2022\Support Files\Plug-insAnd named Rowbyte.
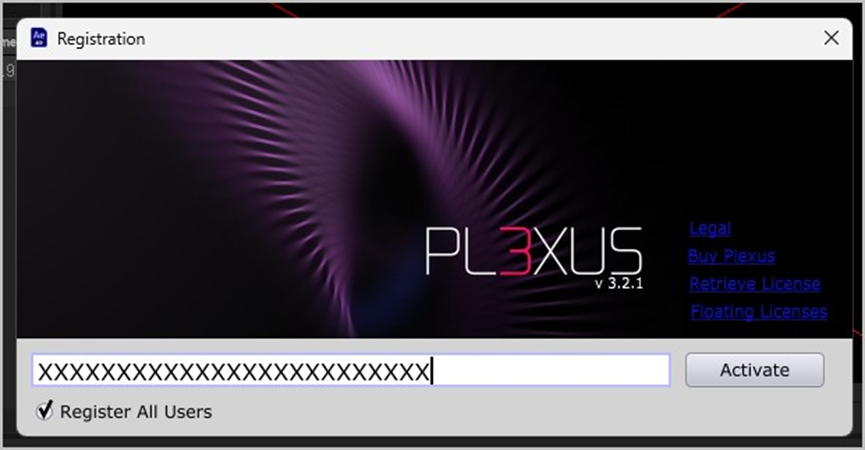
We can right click on it and send it to a zip file named Rowbyte.zip for further use. Then we open After Effects and the Plexus activation screen and activate it.
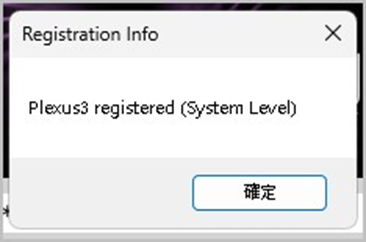
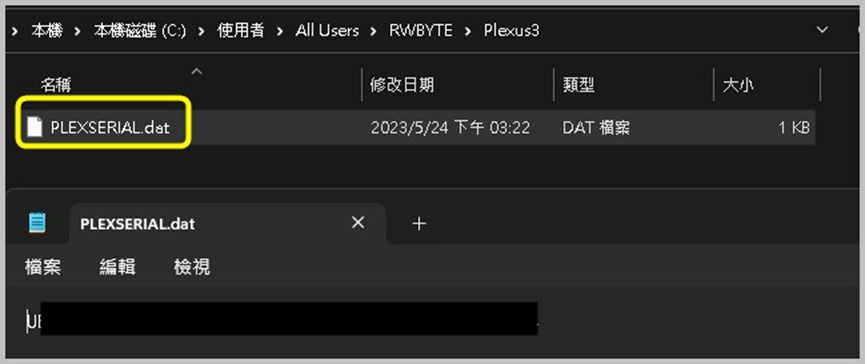
Ater the activation, we locate the file path in:
C:\Users\All UsersAnd named RWBYTE.

We can right click on it and send it to a zip file named RWBYTE.zip for further use.
Now we put Rowbyte.zip and RWBYTE.zip on desktop and go back to the terminal. Run the following command to install the plugin to the container.
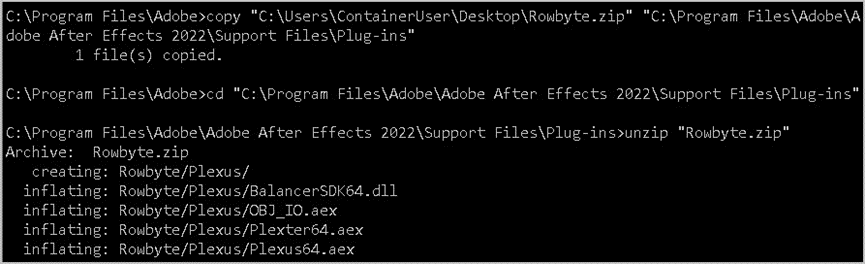
copy "C:\Users\ContainerUser\Desktop\Rowbyte.zip" "C:\Program Files\Adobe\Adobe After Effects 2022\Support Files\Plug-ins"
cd "C:\Program Files\Adobe\Adobe After Effects 2022\Support Files\Plug-ins"
unzip "Rowbyte.zip"
Run the following command to put the activation file.
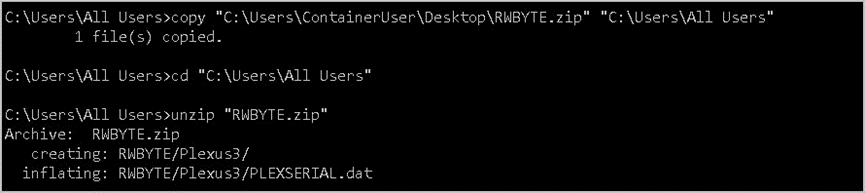
copy "C:\Users\ContainerUser\Desktop\RWBYTE.zip" "C:\Users\All Users"
cd "C:\Users\All Users"
unzip "RWBYTE.zip"
We are done.
Rendering Locally
We can try to render some sample projects on local container before we deploy this image on Azure.
You can download a sample project file from this YouTuber (not me), here is the sample project files. Please unzip the project file, put any of the file into container and run the command.
"C:\Program Files\Adobe\Adobe After Effects 2022\Support Files\aerender.exe" -project "C:\Users\ContainerAdministrator\Desktop\EP_EFFECT\RAW\DN.aep" -comp "Day" -output "DN.mov" -s 0 -e 100Please change C:\Users\ContainerAdministrator\Desktop\EP_EFFECT\RAW\DN.aep to your actual file path and name inside the container.
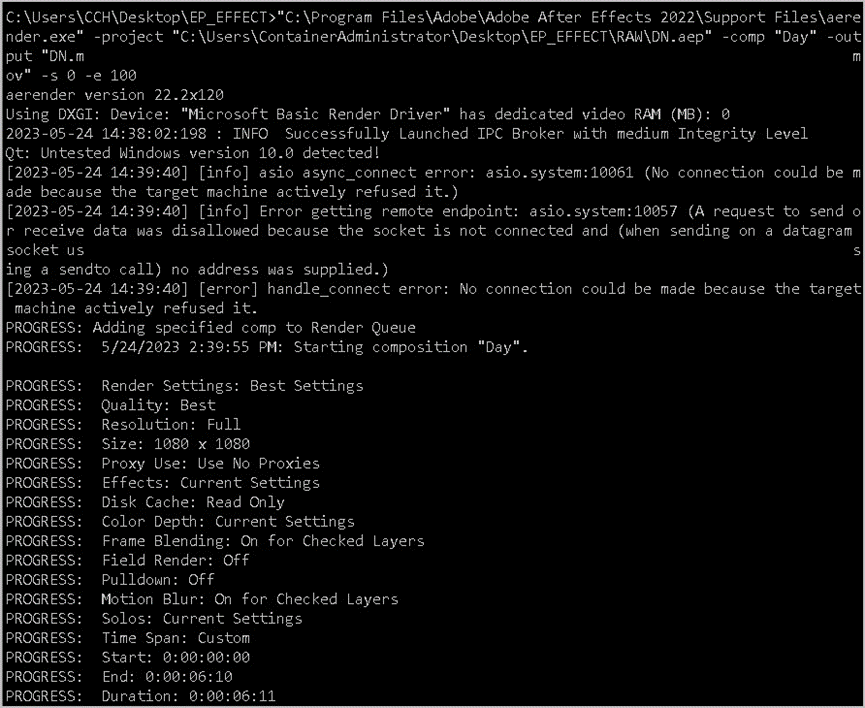
Cool! We are rendering inside a container.
Rendering on Azure App Service
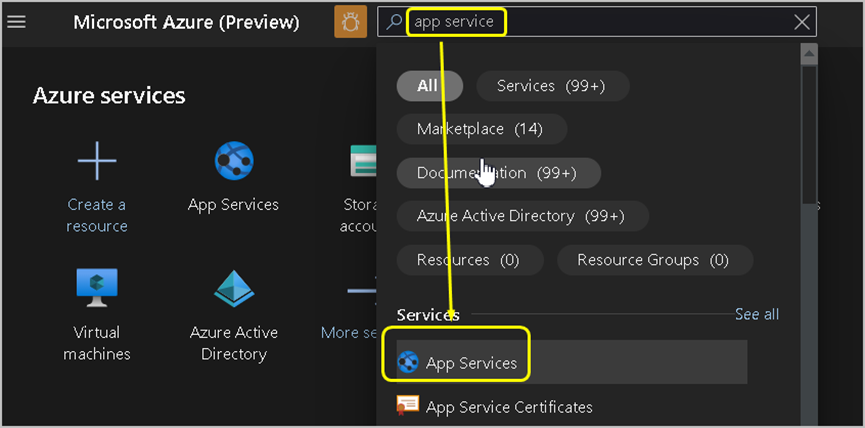
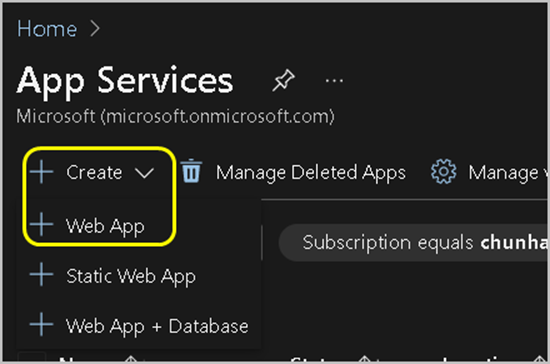
Now we can try to make it on the cloud. Go to https://portal.azure.com and search for app service.
In App Service, create a new Web App
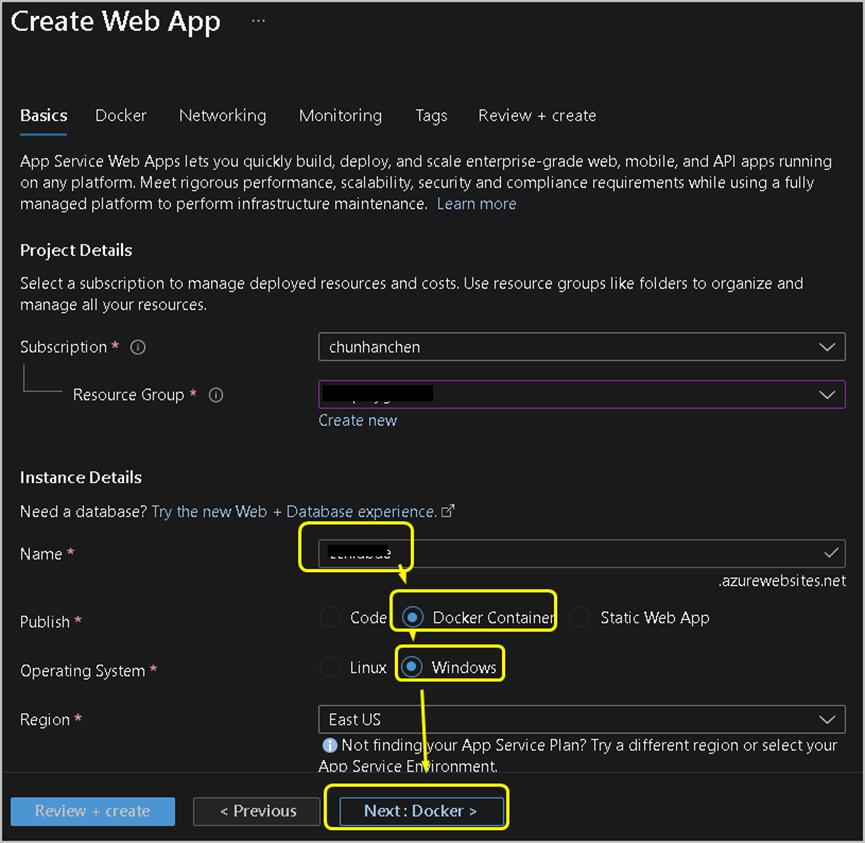
Give it a name (we will use it later), for example yourname, select Docker Container, select Windows, click Next.
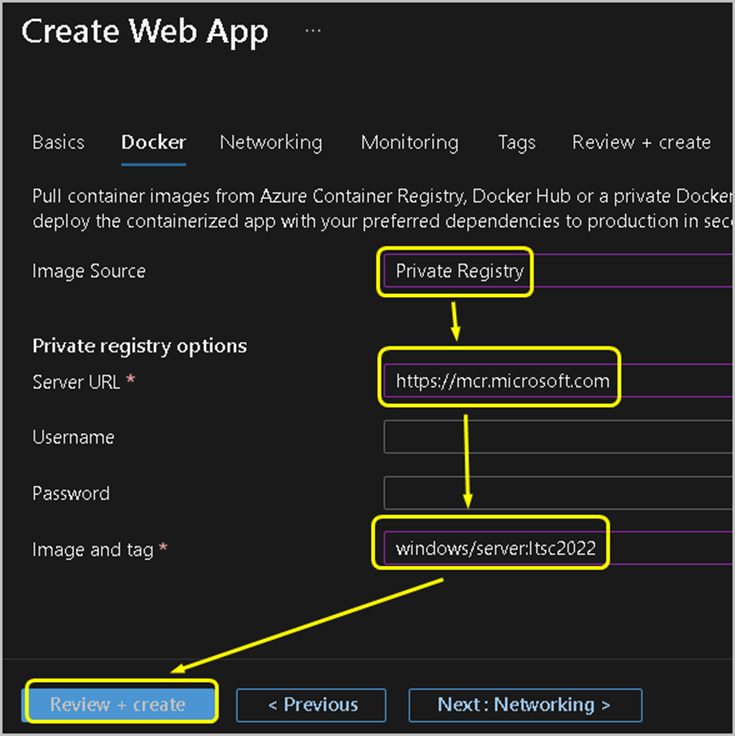
Select Private Registry, input mcr.microsoft.com into Server URL, input windows/server:ltsc2022 into Image and tag, click Review + create
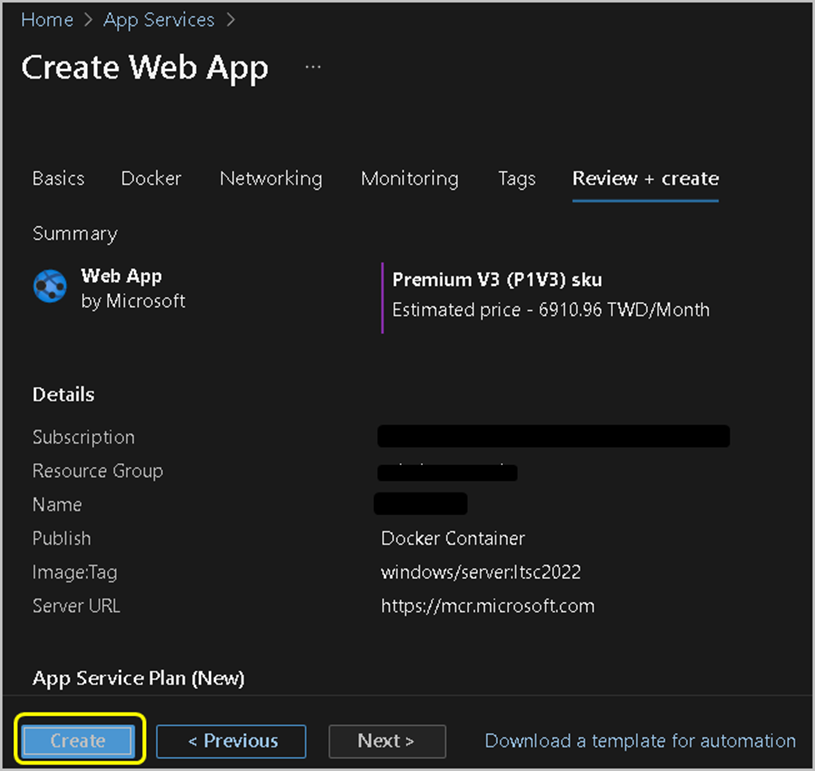
Check the information and create.
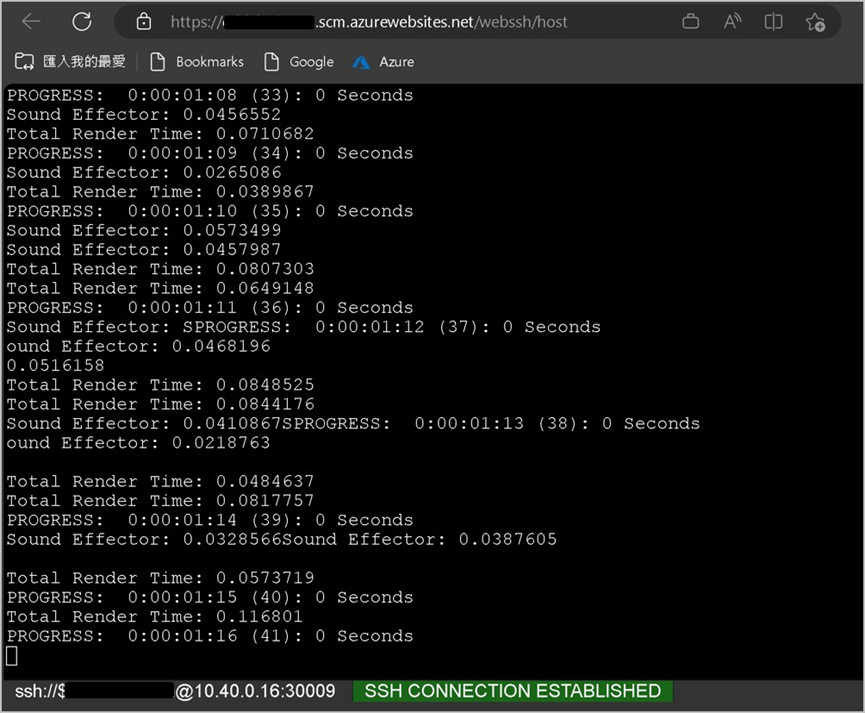
It might take a while for preparing, please go to https://yourname.scm.azurewebsites.net/webssh/host after the online container has ready.
Please change yourname into the name you have specified in the application previously.
After we applied all the command mentioned previously in the App Service Container, we can finally see it works.
Conclusion
Using Cloud rendering is possible. At this stage, it may not be practical due to cost-effectiveness and various hardware and software limitations. However, as a research topic, it is quite an interesting one.